
A practical starting footprint for four towers, the IBC, foliage, hoses, and service access.
Plan before you buy
Where should a DIY hydroponic tower system go?
Choose a spot with enough sunlight for your crops, safe water and power access, drainage, wind protection, and room to work around mature plants. For the standard four-tower HydroPip layout, start with a working area of approximately 12 by 8 feet and adjust for your yard.
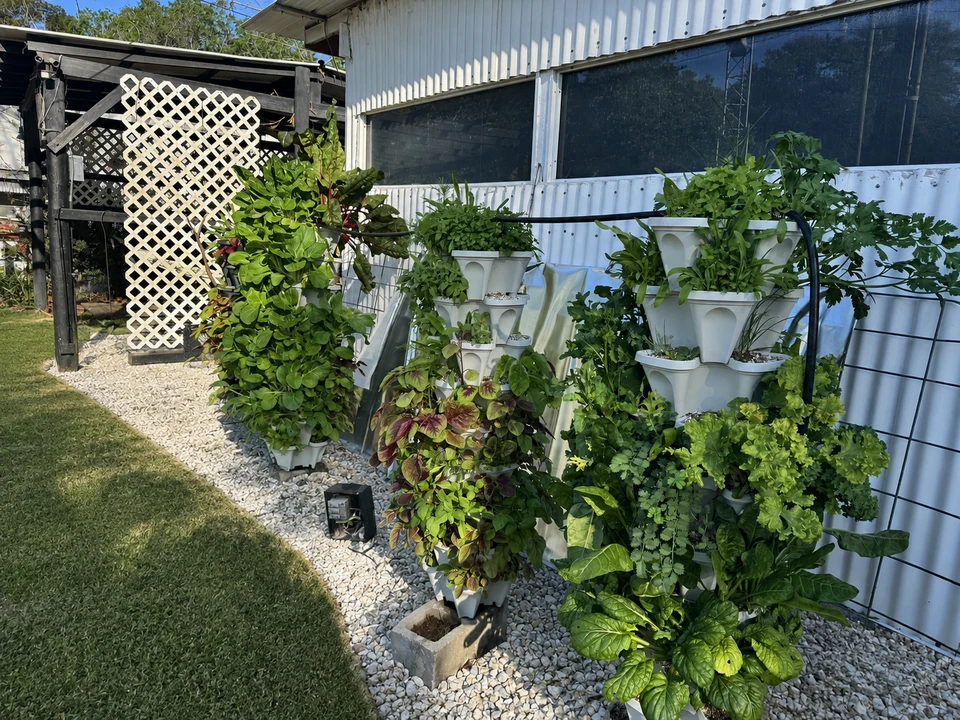
Many vegetables prefer six or more hours of direct light, while hot climates may benefit from afternoon protection.
Leave room to inspect feed lines, prune, harvest, flush the hose, and reach both pumps safely.
Placement checklist
Check the conditions that matter before driving a support pipe.
The best location is not necessarily the sunniest corner. It is the place where crops can grow and the system can be operated safely without turning routine care into an obstacle course.
1. Sun and heat
Watch the proposed area through the day. Leafy greens and herbs can tolerate different exposure than tomatoes or peppers. In hot climates, intense late-afternoon sun can increase heat stress and reservoir temperature, so morning sun with some afternoon protection may be useful.
2. Working clearance
Picture the towers fully grown. Keep paths wide enough to reach the back of each tower, remove planter sections, carry media tubs, prune large leaves, and service the IBC. Do not position towers so mature plants block the only route to the pumps.
3. Water and drainage
Place the system where the IBC can be filled without dragging a hose through the house. HydroPip is a timed-runoff system, so choose a surface and direction where normal drainage will not create mud, damage a foundation, cross a walkway, or affect a neighbor.
4. Outdoor electrical safety
Use GFCI-protected power and outdoor-rated pumps, cords, timers, plugs, and enclosures. Keep every connection elevated and dry, use drip loops, and disconnect power before touching the reservoir, pumps, cords, or water.
5. Wind and support depth
Tower height, crop canopy, and local wind affect support needs. HydroPip uses 8- to 10-foot galvanized steel support pipe depending on conditions. Before driving any pipe, confirm underground utilities and call 811 or your local utility-marking service.
6. IBC safety and access
Use only a tote with documented food-safe or non-hazardous prior contents. Keep the access opening, mixing return hose, pump cords, and outlet reachable. Shade or cover the IBC when practical without blocking inspection or ventilation around electrical equipment.
Use a photo when the choice is not obvious. Tell Pip the available width and depth, tower count, sun pattern, surface, wind exposure, and nearby water and power. A clear wide photo can help Pip spot access and layout issues before you buy or install parts.
Quick answers
Common placement questions
Can I start with less space?
Yes. Start with one or two towers and leave room to add more later. Track My Build adjusts quantities for the selected tower count.
Does the IBC have to sit beside the towers?
No, but shorter, simpler hose runs generally reduce friction and make inspection easier. Pip can help assess a proposed layout before installation.
Can the system go on concrete?
The standard supports are driven into soil. A hard-surface installation needs a different engineered stabilization plan and should not be improvised from the ground-driven instructions.

Have a spot in mind?
Check the system overview, open the full Field Guide, estimate the build, or ask Pip whether your proposed area can work.